The Zone System Explained Part One: Seeing Light Like Ansel Adams
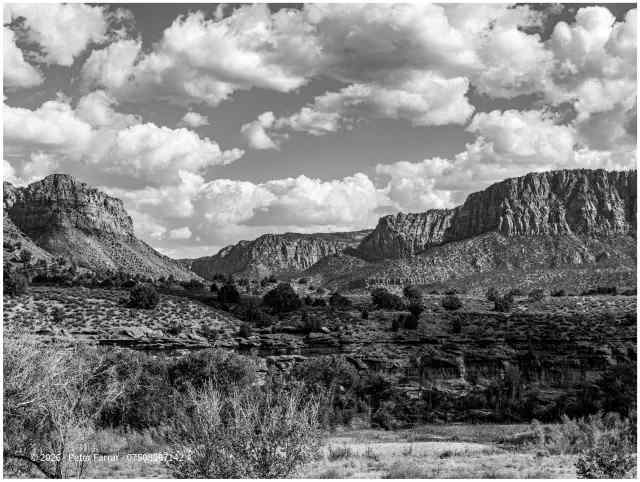
Few names in photography carry the same weight as Ansel Adams. His black and white landscapes remain some of the most striking images ever made, not simply because of dramatic scenery, but because of how precisely he understood light. At the centre of that mastery was something called The Zone System. If the phrase sounds technical, it is. But it is also one of the most useful ways any photographer can learn to truly see a scene before pressing the shutter.
Today, even in the age of digital cameras and instant previews, the principles remain powerful. This is Part One of a two part guide. In this first article, we’ll cover what the Zone System is, why it matters, and how it changes the way you look at light. In Part Two, we’ll explore how to apply it practically with modern digital cameras.
What Is the Zone System?
The Zone System was developed by Ansel Adams and Fred Archer in the 1930s as a way to control exposure and tonal range in photography. Instead of thinking in vague terms like “bright” or “dark,” they divided tones into 11 zones, from pure black to pure white.
- Zone 0 = Pure black with no detail
- Zone I-II = Very deep shadows with minimal texture
- Zone III-IV = Dark textured areas
- Zone V = Middle grey
- Zone VI-VII = Light textured tones
- Zone VIII-IX = Very bright highlights with slight detail
- Zone X = Pure white with no detail
Why This Matters
Most beginners expose a photo based only on what the camera meter says. That often creates acceptable results, but not intentional ones.
The Zone System teaches you to ask:
- Where should the shadows fall?
- What detail must remain visible?
- How bright should the highlights be?
- What mood should the image carry?
This transforms photography from recording a scene into interpreting it. That distinction is where strong photography begins.
A Simple Example
Imagine photographing a snow covered mountain under dark storm clouds. A camera meter may try to average the scene and turn the snow grey. It does not know the snow should look bright.
Ansel Adams would mentally place the snow in Zone VII or VIII - bright, luminous, still detailed. The clouds may fall into Zone III or IV - dramatic, rich, textured shadows. That deliberate tonal placement is what gives an image power.
Why It Still Matters In Digital Photography
Many assume the Zone System died with film. It did not. Modern tools simply changed how we apply it:
- Histograms show tonal distribution
- Highlight warnings reveal clipped whites
- RAW files allow recovery latitude
- Editing software lets us fine-tune zones afterward
But the eye behind the camera still matters most. If you can recognise tones before you shoot, your photography improves dramatically.
Training Your Eye
Next time you walk outside, look at a scene and ask yourself:
- What is the darkest tone here?
- What is the brightest tone?
- Where is middle grey?
- Which areas need detail?
- Which areas can fall into shadow?
Do this often enough, and exposure becomes instinctive. That is what masters like Ansel developed: not just camera skill, but visual judgement.
Coming Next: Part Two
In the next article, we’ll bring the Zone System into the modern era: how to use Ansel Adams’ Zone System with today’s digital cameras, histograms, RAW files, and editing software. Once you understand that step, you stop reacting to light, and start controlling it.

538 pages covering technique, workflow, business, and UK & US photography law, everything in one book.
Leave a Comment